Quickstart
A guided walk through the One Privacy setup, end to end. The dashboard work takes a few minutes. The install on your website depends on your platform and is usually a single tag in Google Tag Manager or a small change by a developer.
What you'll need
The website you want to add a banner to.
A way to add the banner to your site, such as Google Tag Manager, your CMS (WordPress, Shopify), or a developer who can drop in a small tag.
Access to confirm you own the website. We walk you through it.
The steps
- Sign up and get your account.
- Add your website.
- Confirm the website is yours.
- Run your first scan.
- Customize the banner and publish it.
- Add the banner to your website.
With automatic setup on (the default), your banners and geo rules are created and published in step 2. Steps 1, 2, 3, and 6 are all you need to go live. Steps 4 and 5 are optional and can be done at any time.
1. Sign up and get your account
Open the sign up page, enter your email and a password, then click Create account.
A verification email goes to your inbox. Click the link inside it, then sign in.
More detail: Signing up.
2. Add your website
After signing in, you land on the Workspaces page.
Click New Workspace and provide:
A name for your workspace (this is just for you, your company name works well).
The domain of your website, in the form https://example.com.
Your privacy policy URL (optional). The banner links to it. Leave it empty and the link stays hidden until you add one in Customization.
Set up banners and geo rules automatically (on by default). One Privacy creates and publishes three banners and three geo rules for you: a GDPR opt-in banner for the EEA, the UK, and Switzerland, a Do Not Sell banner for the US, and a notice banner for the rest of the world. Google Consent Mode is live from the first page view. Turn it off if you want to build the banner yourself.
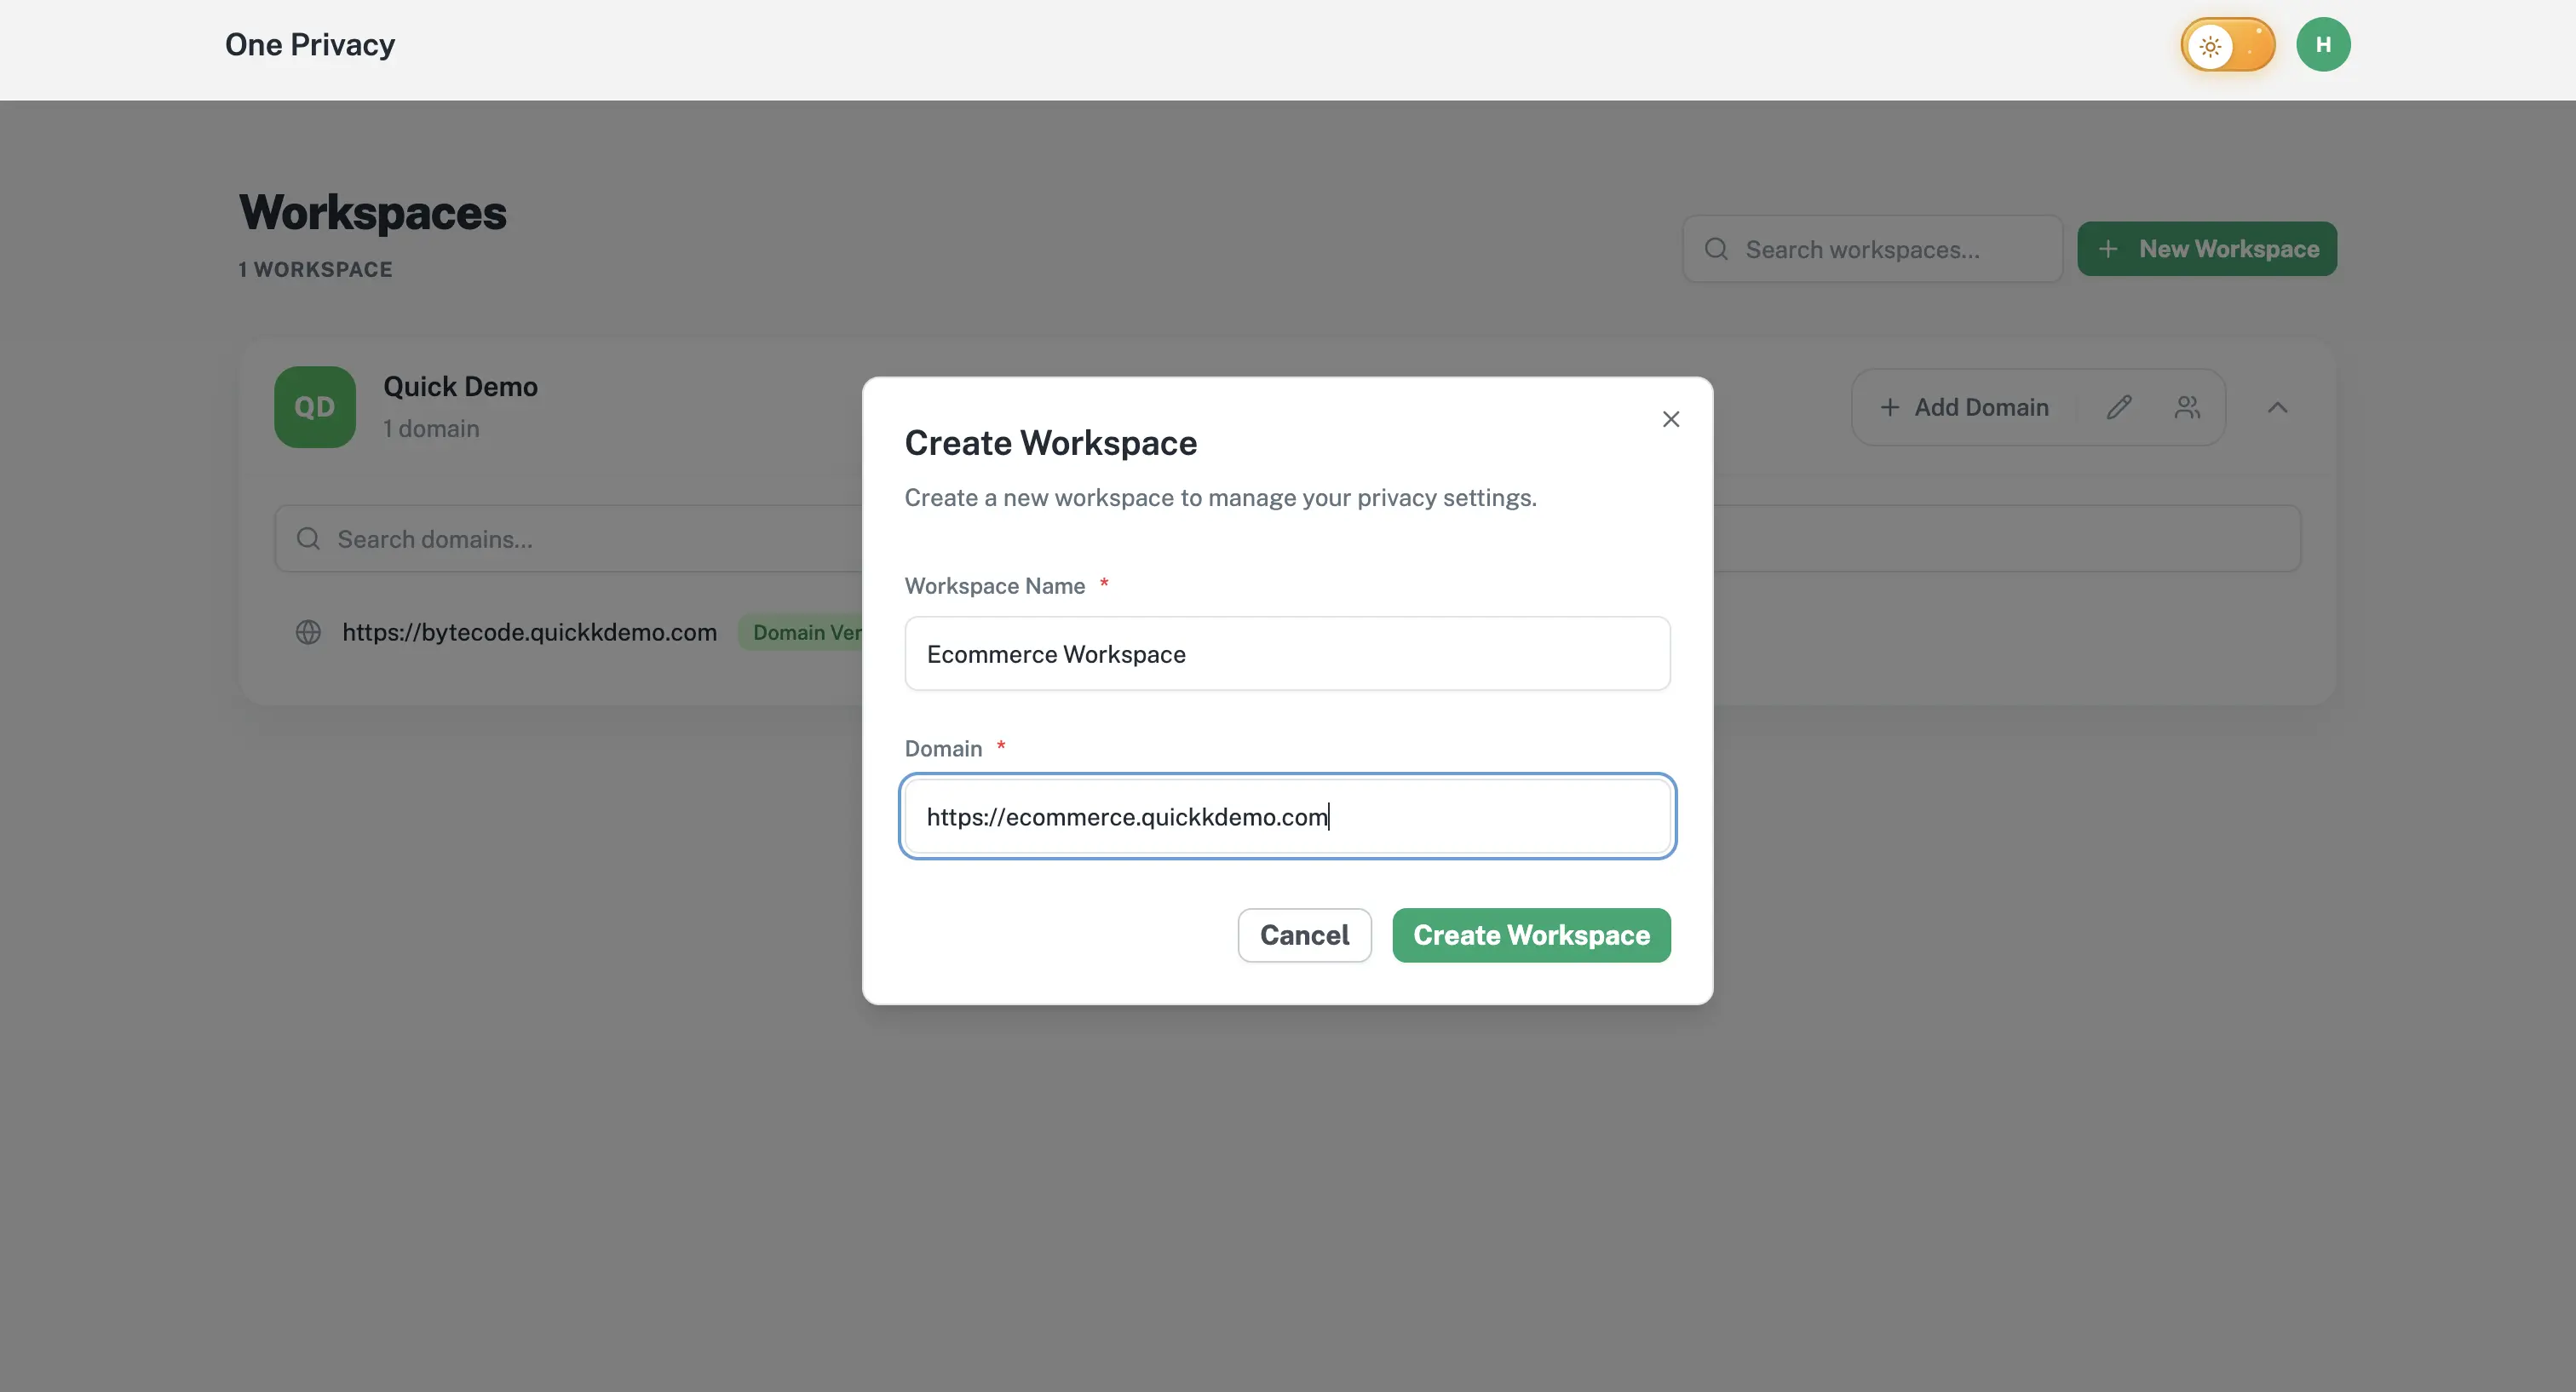
Click Create Workspace. Your workspace is set up and your website is added as the first project. With automatic setup on, you land on the Scripts page with the install snippet ready; steps 5 and 6 below are then optional edits, not required work.
More detail: Creating a workspace.
3. Confirm the website is yours
On the Workspaces page, your website shows a Pending verification badge. Click Verify now and a dialog walks you through confirming ownership.
If you'd rather pass this step to your developer or IT team, send them the Verifying your website page.
When the check passes, you're set.
4. Run your first scan
Open your project and go to Cookies → Scanner, then click Start scan.
One Privacy visits your website the way a real visitor would and lists every cookie and tracker running on it. A small site usually finishes in a few minutes.
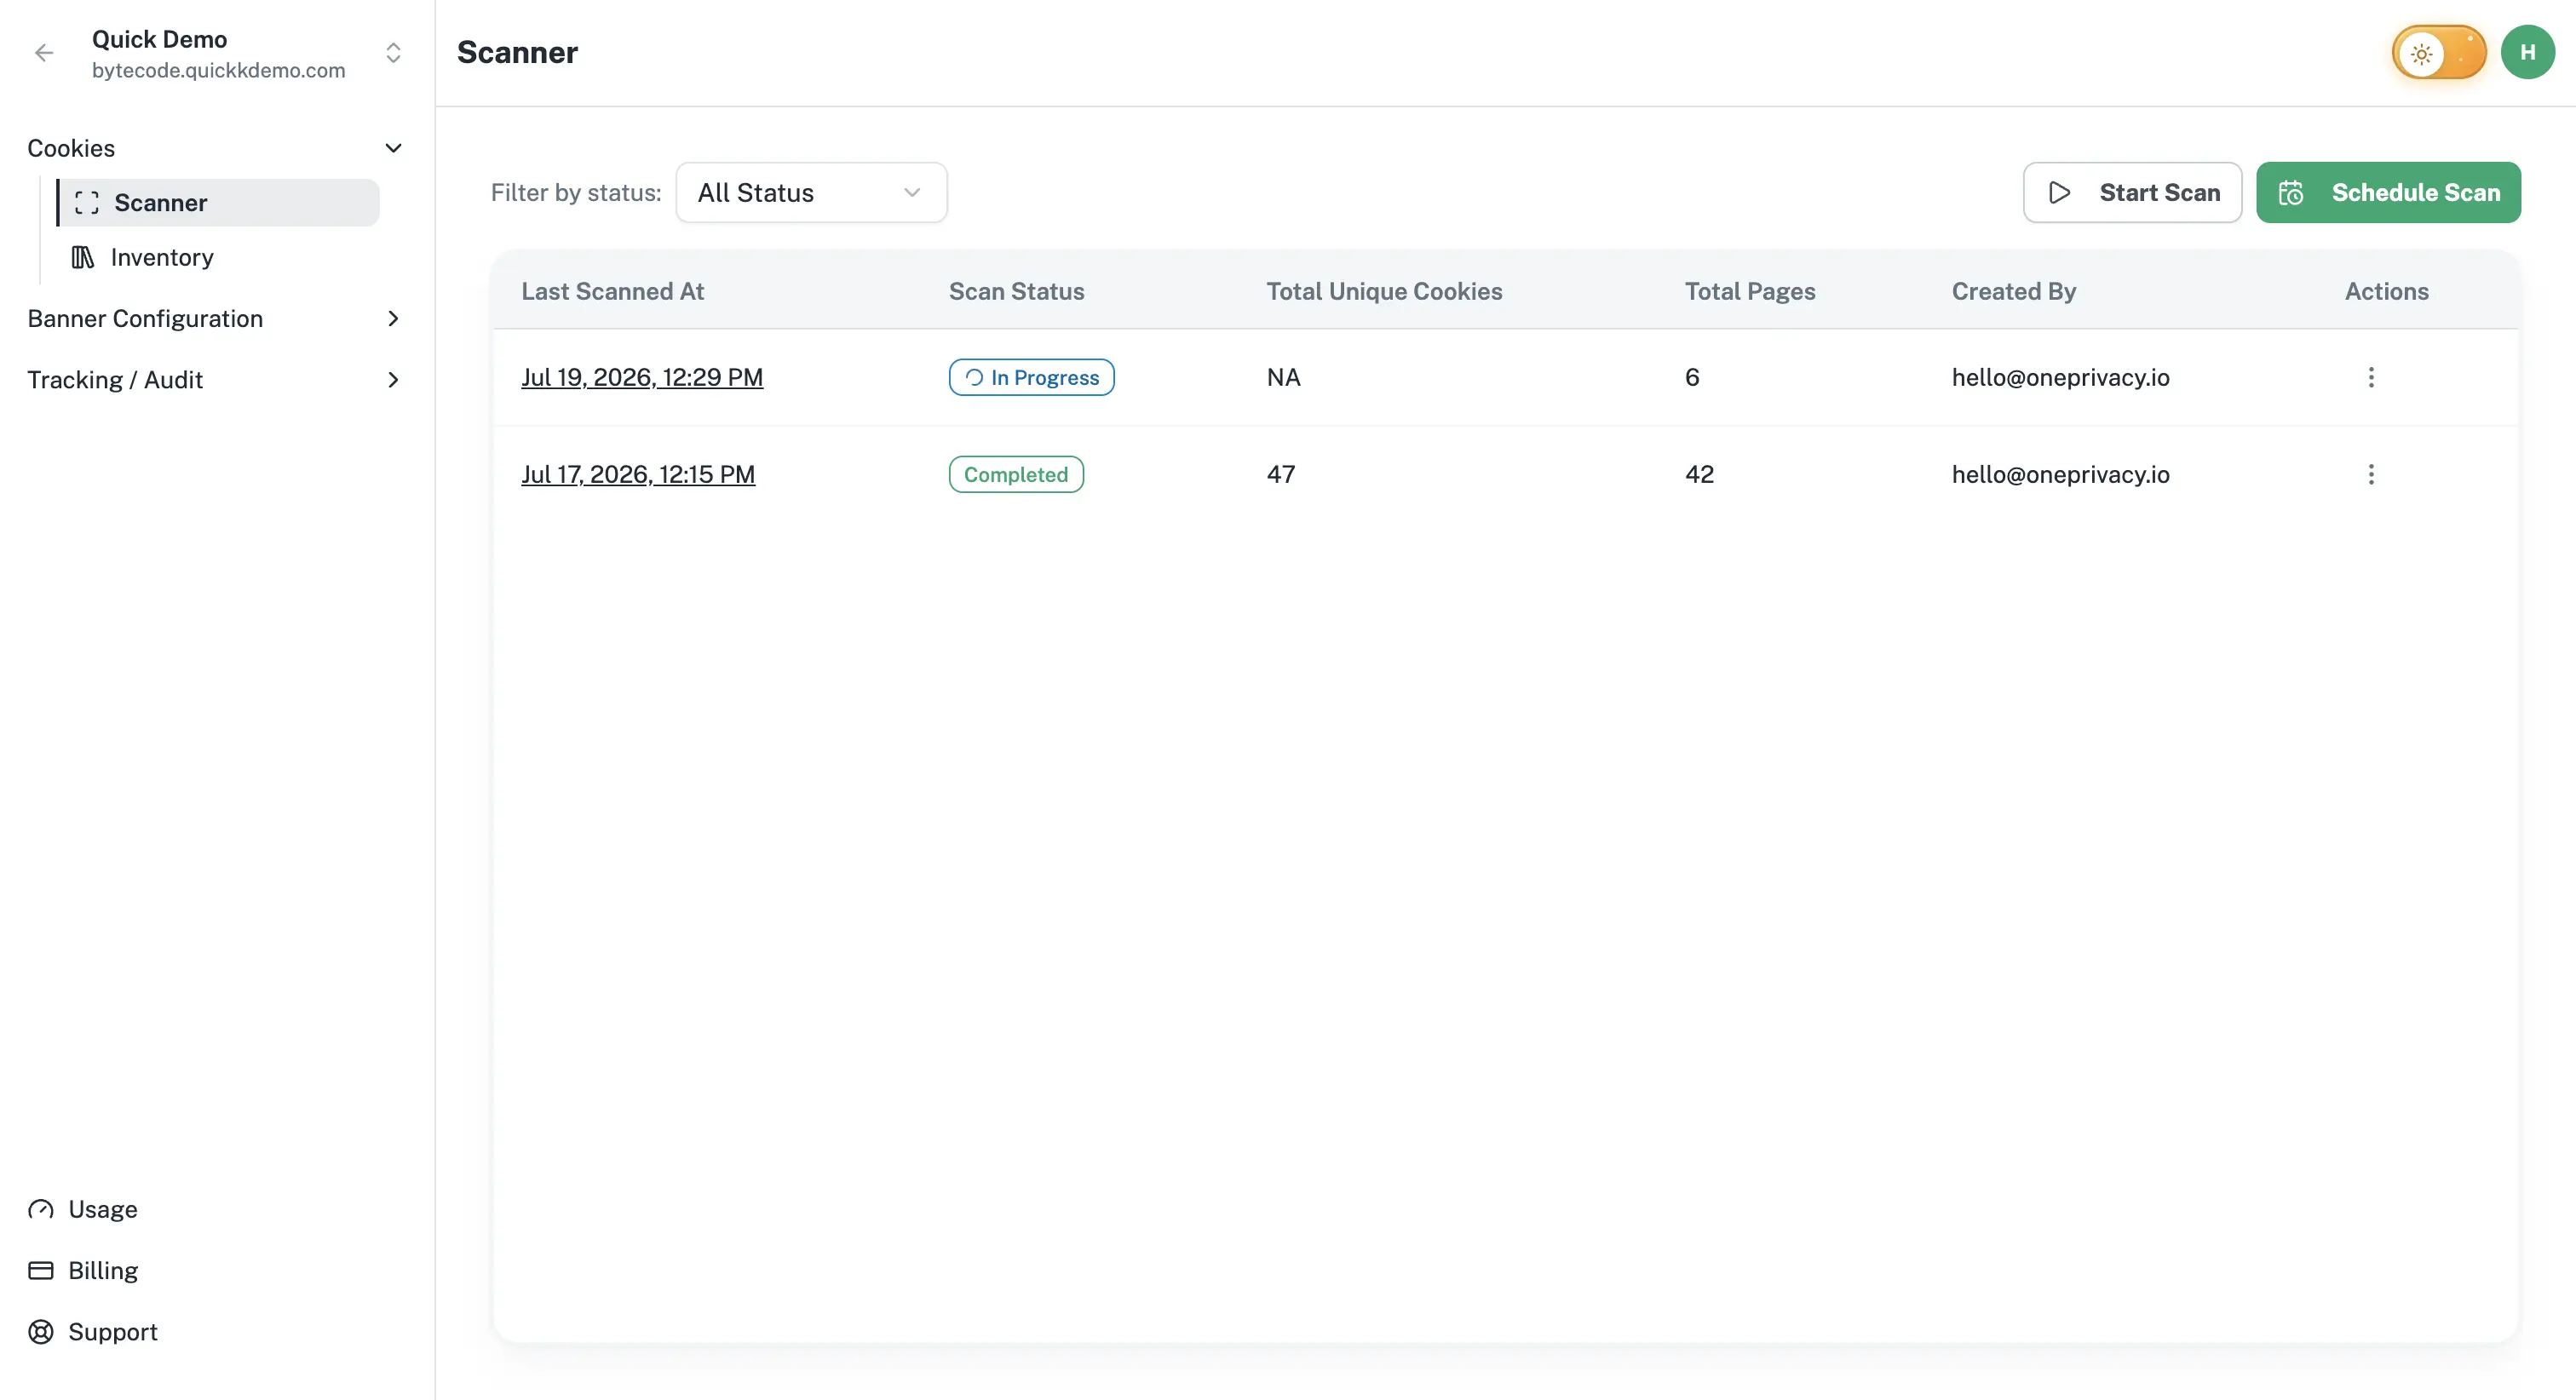
When the scan finishes, you'll see a tidy list of cookies. This is what your banner will be asking visitors about.
More detail: Running a scan.
5. Customize and publish
If you kept automatic setup on, your banners are already published. This step is for changing how they look and read.
Go to Banner Configuration → Customization.
You'll see the banner with a live preview on the right. A few easy first edits:
Set your brand color.
Adjust the wording so it sounds like your business.
Add a second language if you have visitors who speak it.
When the banner looks right, publish it in three stages:
Save draft to keep your changes.
Publish to Test to try it on a staging site first.
Publish to Live once you're happy.
This three-stage flow keeps your live website safe.
More detail: Banner customization overview.
6. Add the banner to your website
Go to Banner Configuration → Scripts.
You'll see two tabs: Test (available on paid plans) and Production.
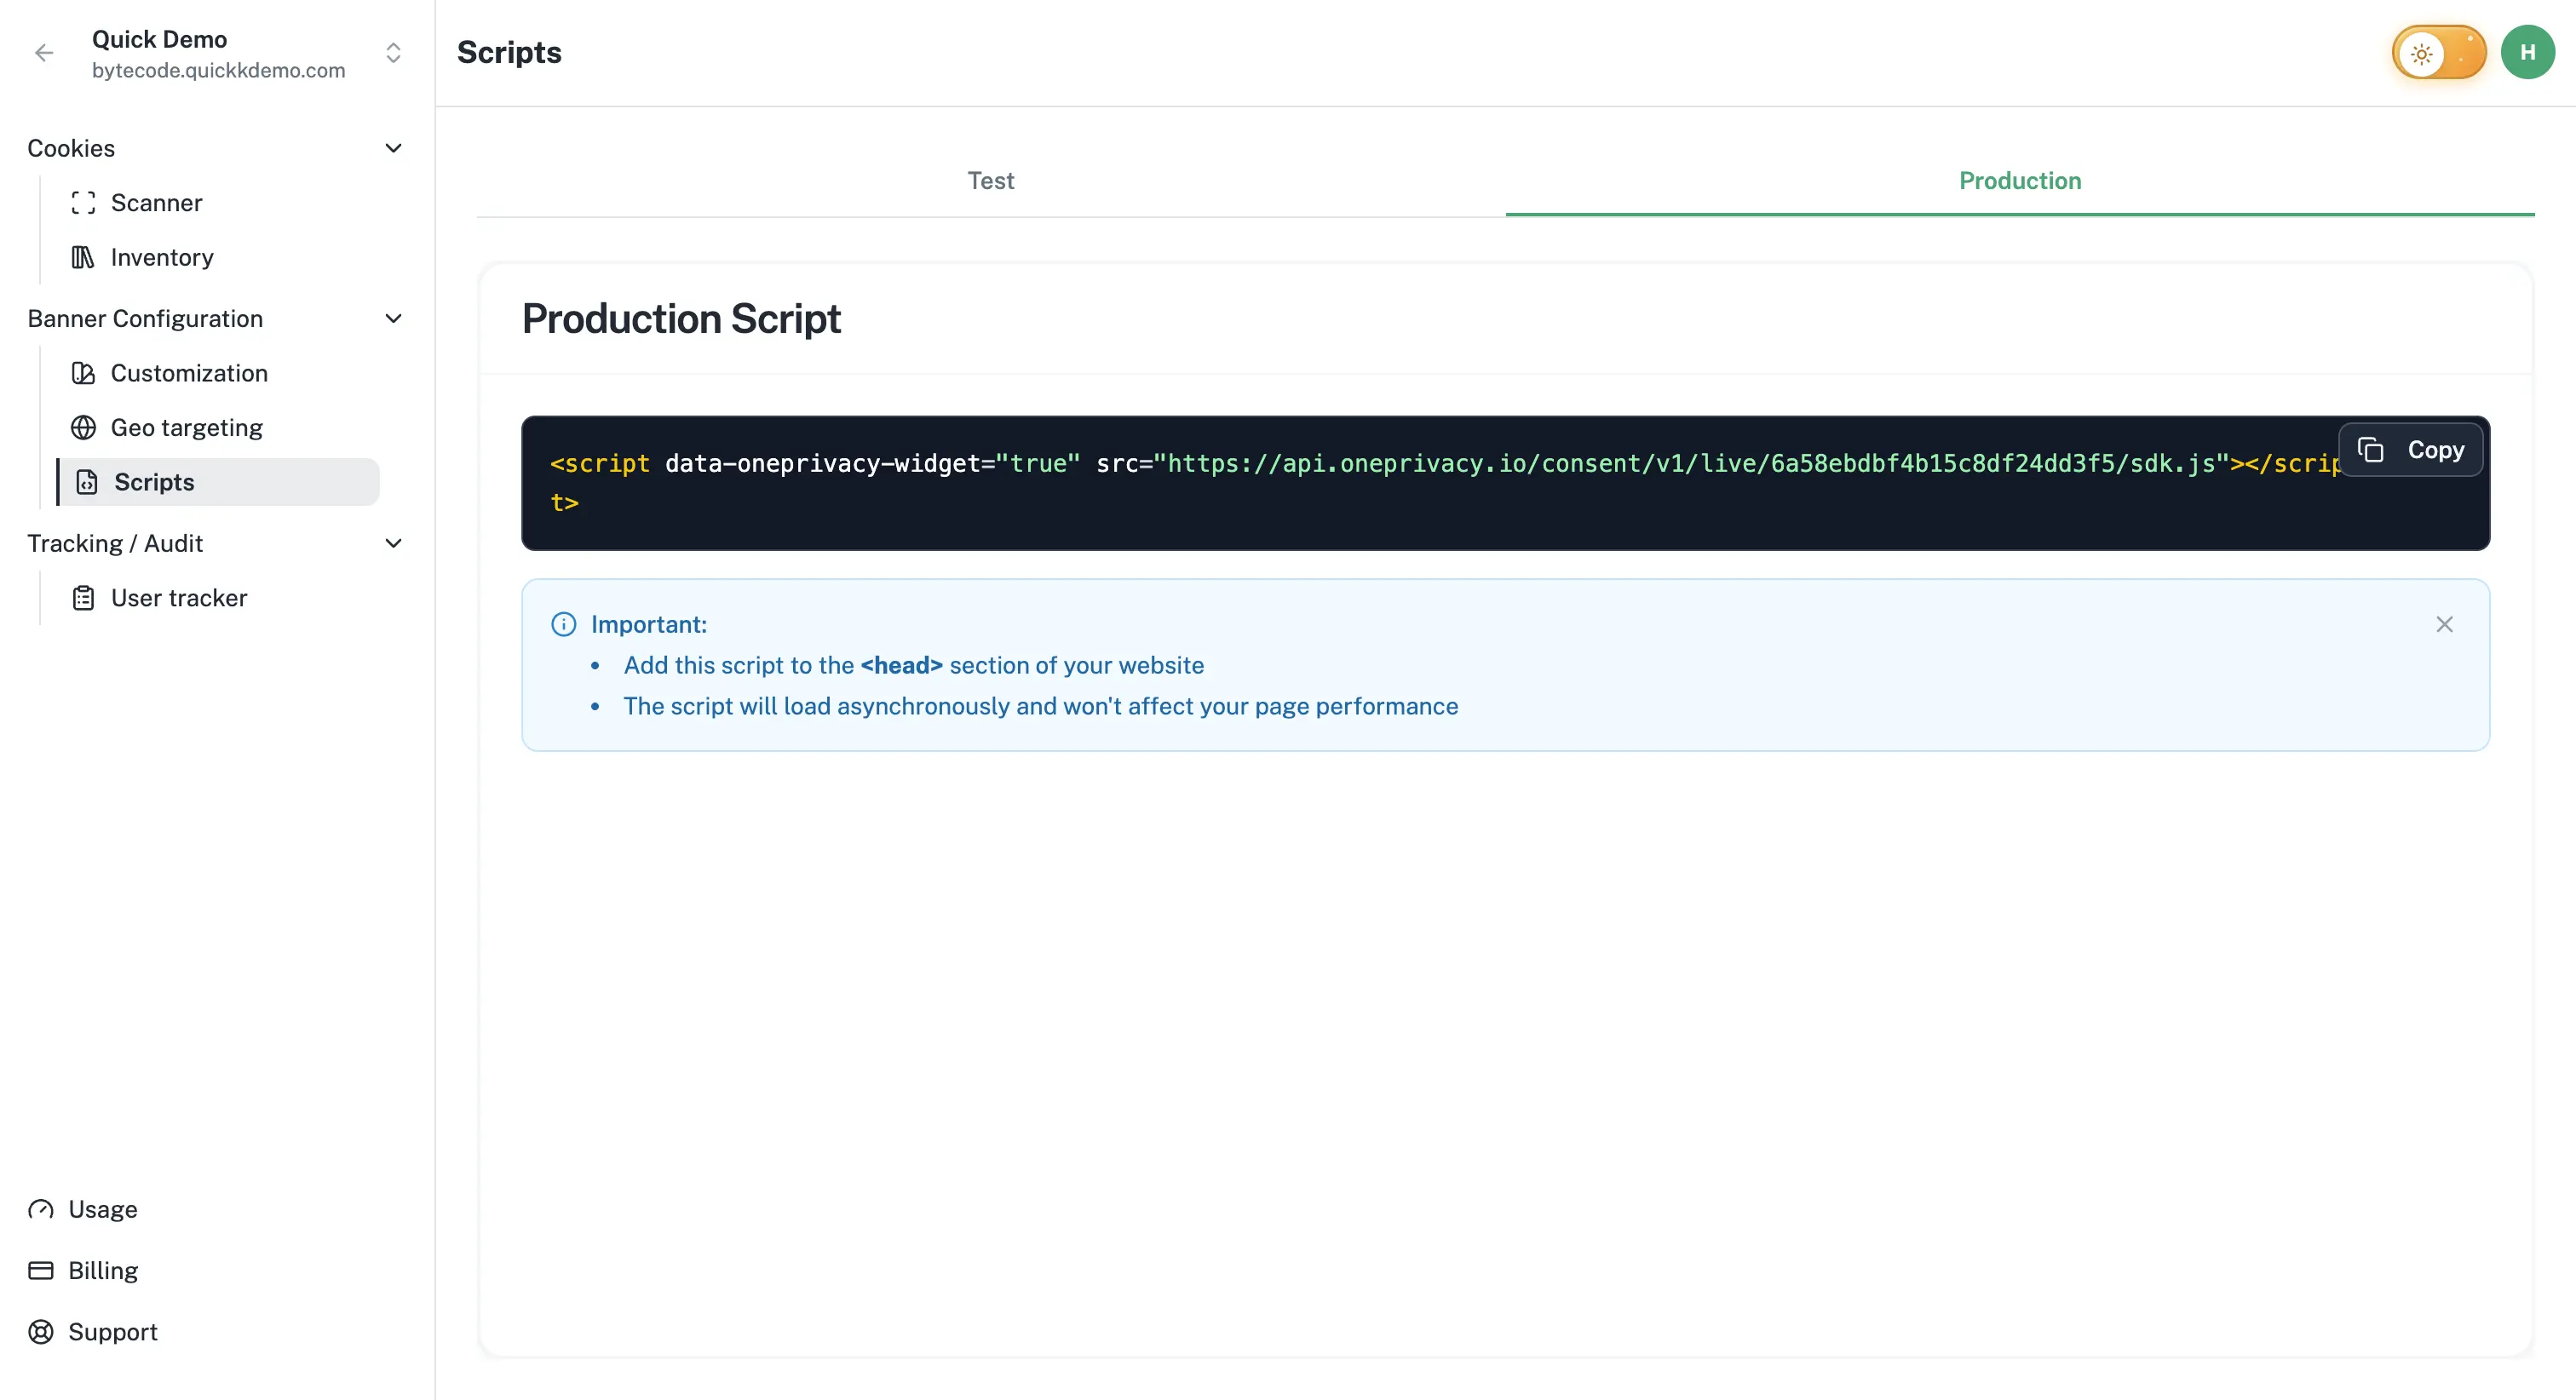
Copy the Production snippet and paste it into the <head> of every page on your website. If you'd rather hand this to your developer or use a platform you already have set up, follow one of our step-by-step guides:
Install with Google Tag Manager
Refresh your website in a fresh browser session (incognito works well) and the banner appears.
You're live
That's the whole setup. A few good next steps.
Turn on a scheduled scan so new trackers are caught automatically.
Set up geo targeting if you have visitors in different regions.
Invite your team so others can help.